

How To Create - A Native App

If you are not familiar with expo, it's a client that helps you build React Native apps with less build complexity. It also helps you deal with the stress of installing and setting up your environment to run React Native.
In this tutorial, we will be building a simple camera app in which the user can take pictures, see previews of their pictures, use flash mode, and switch between the front and the back cameras.
Prerequisites
Expo doesn't require much to start building your first React Native app. You can learn more about installing expo and the expo-cli here in the docs.
Note: in this tutorial, I will be using macOS and iOS. You can use Android as well, there is not much difference when using expo at this point.
You can install expo and expo-cli globally by running the following command:
npm install --global expo-cli Expo requires Nodejs in order to run. You can run the latest version on the official website here.
Getting Started
After you've installed Expo and Nodejs, you can start bootstrapping a new Expo project with the command below:
expo init expo-camera-app How to install the packages and run the app
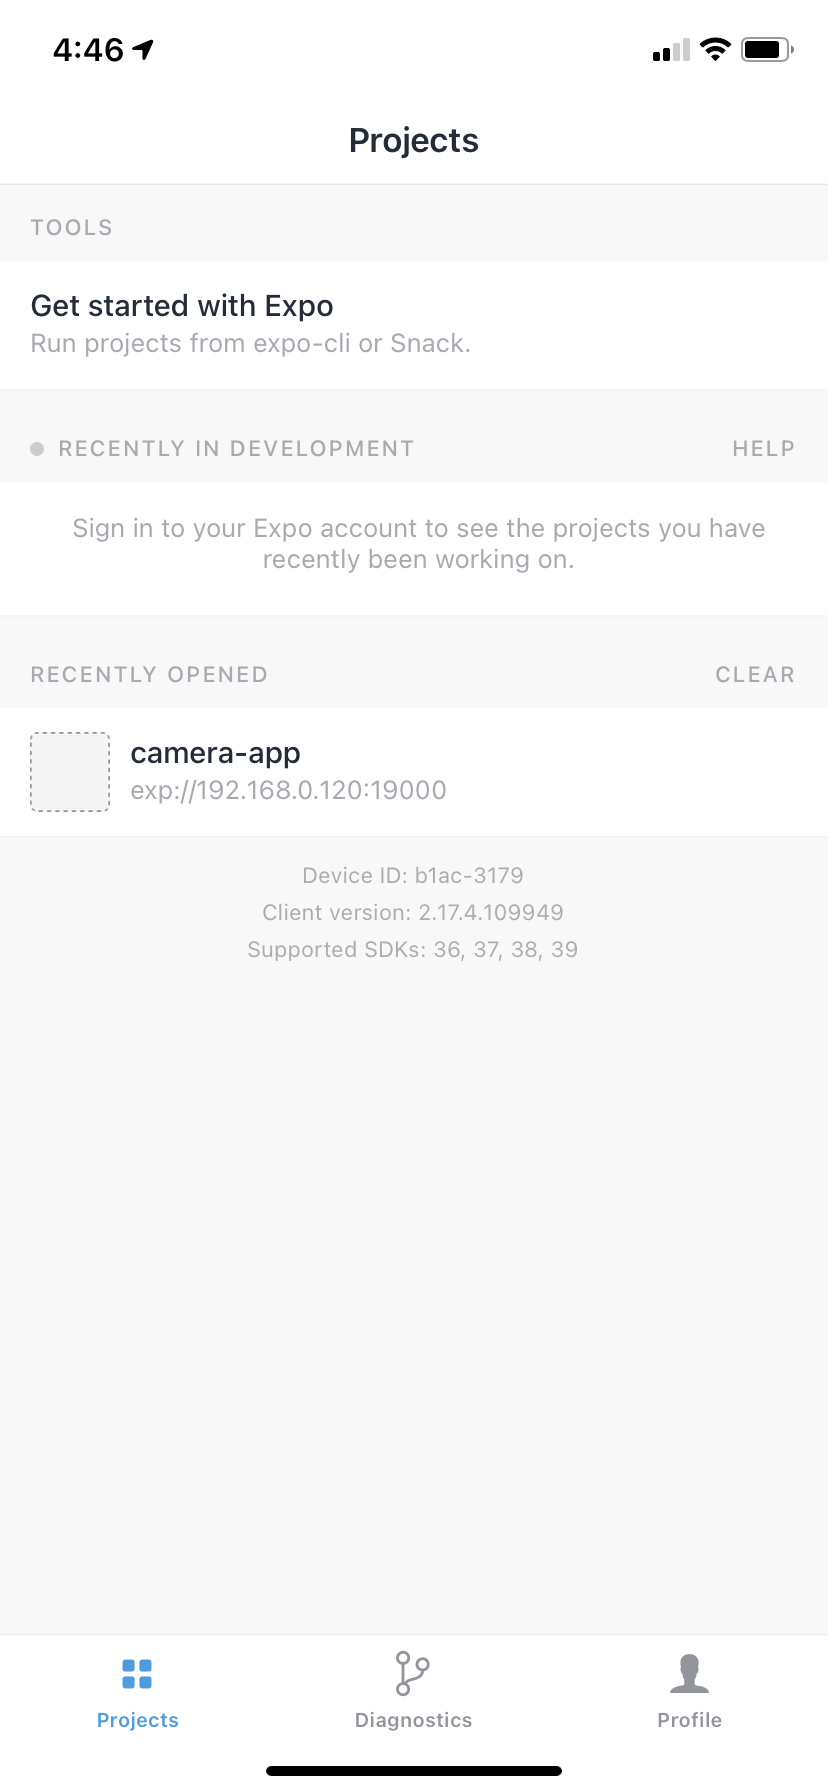
Expo provides us with a client app where we can run and see the preview of the app we are building. It's available on both the App Store and Google Play to download.
This is the interface of the app.
How to init an expo project
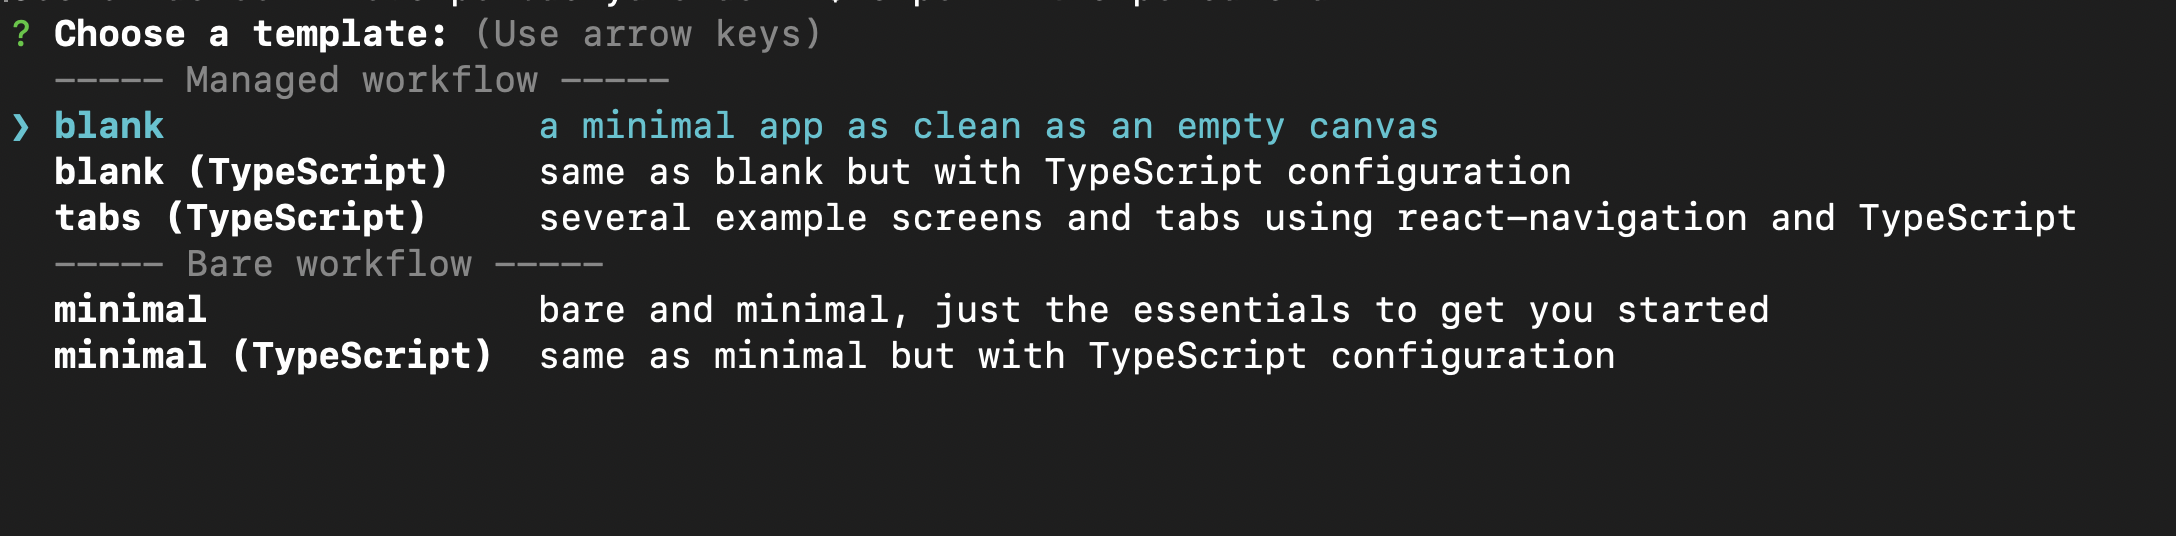
Go the app directory and run the app.
cd expo-camera-app You will be asked a few questions to select the default template for the app. In this tutorial we simply select a blank (TypeScript) option, but again you are free to choose what is right for you.
Run the app
After bootstrapping the project, we can run the app with expo run
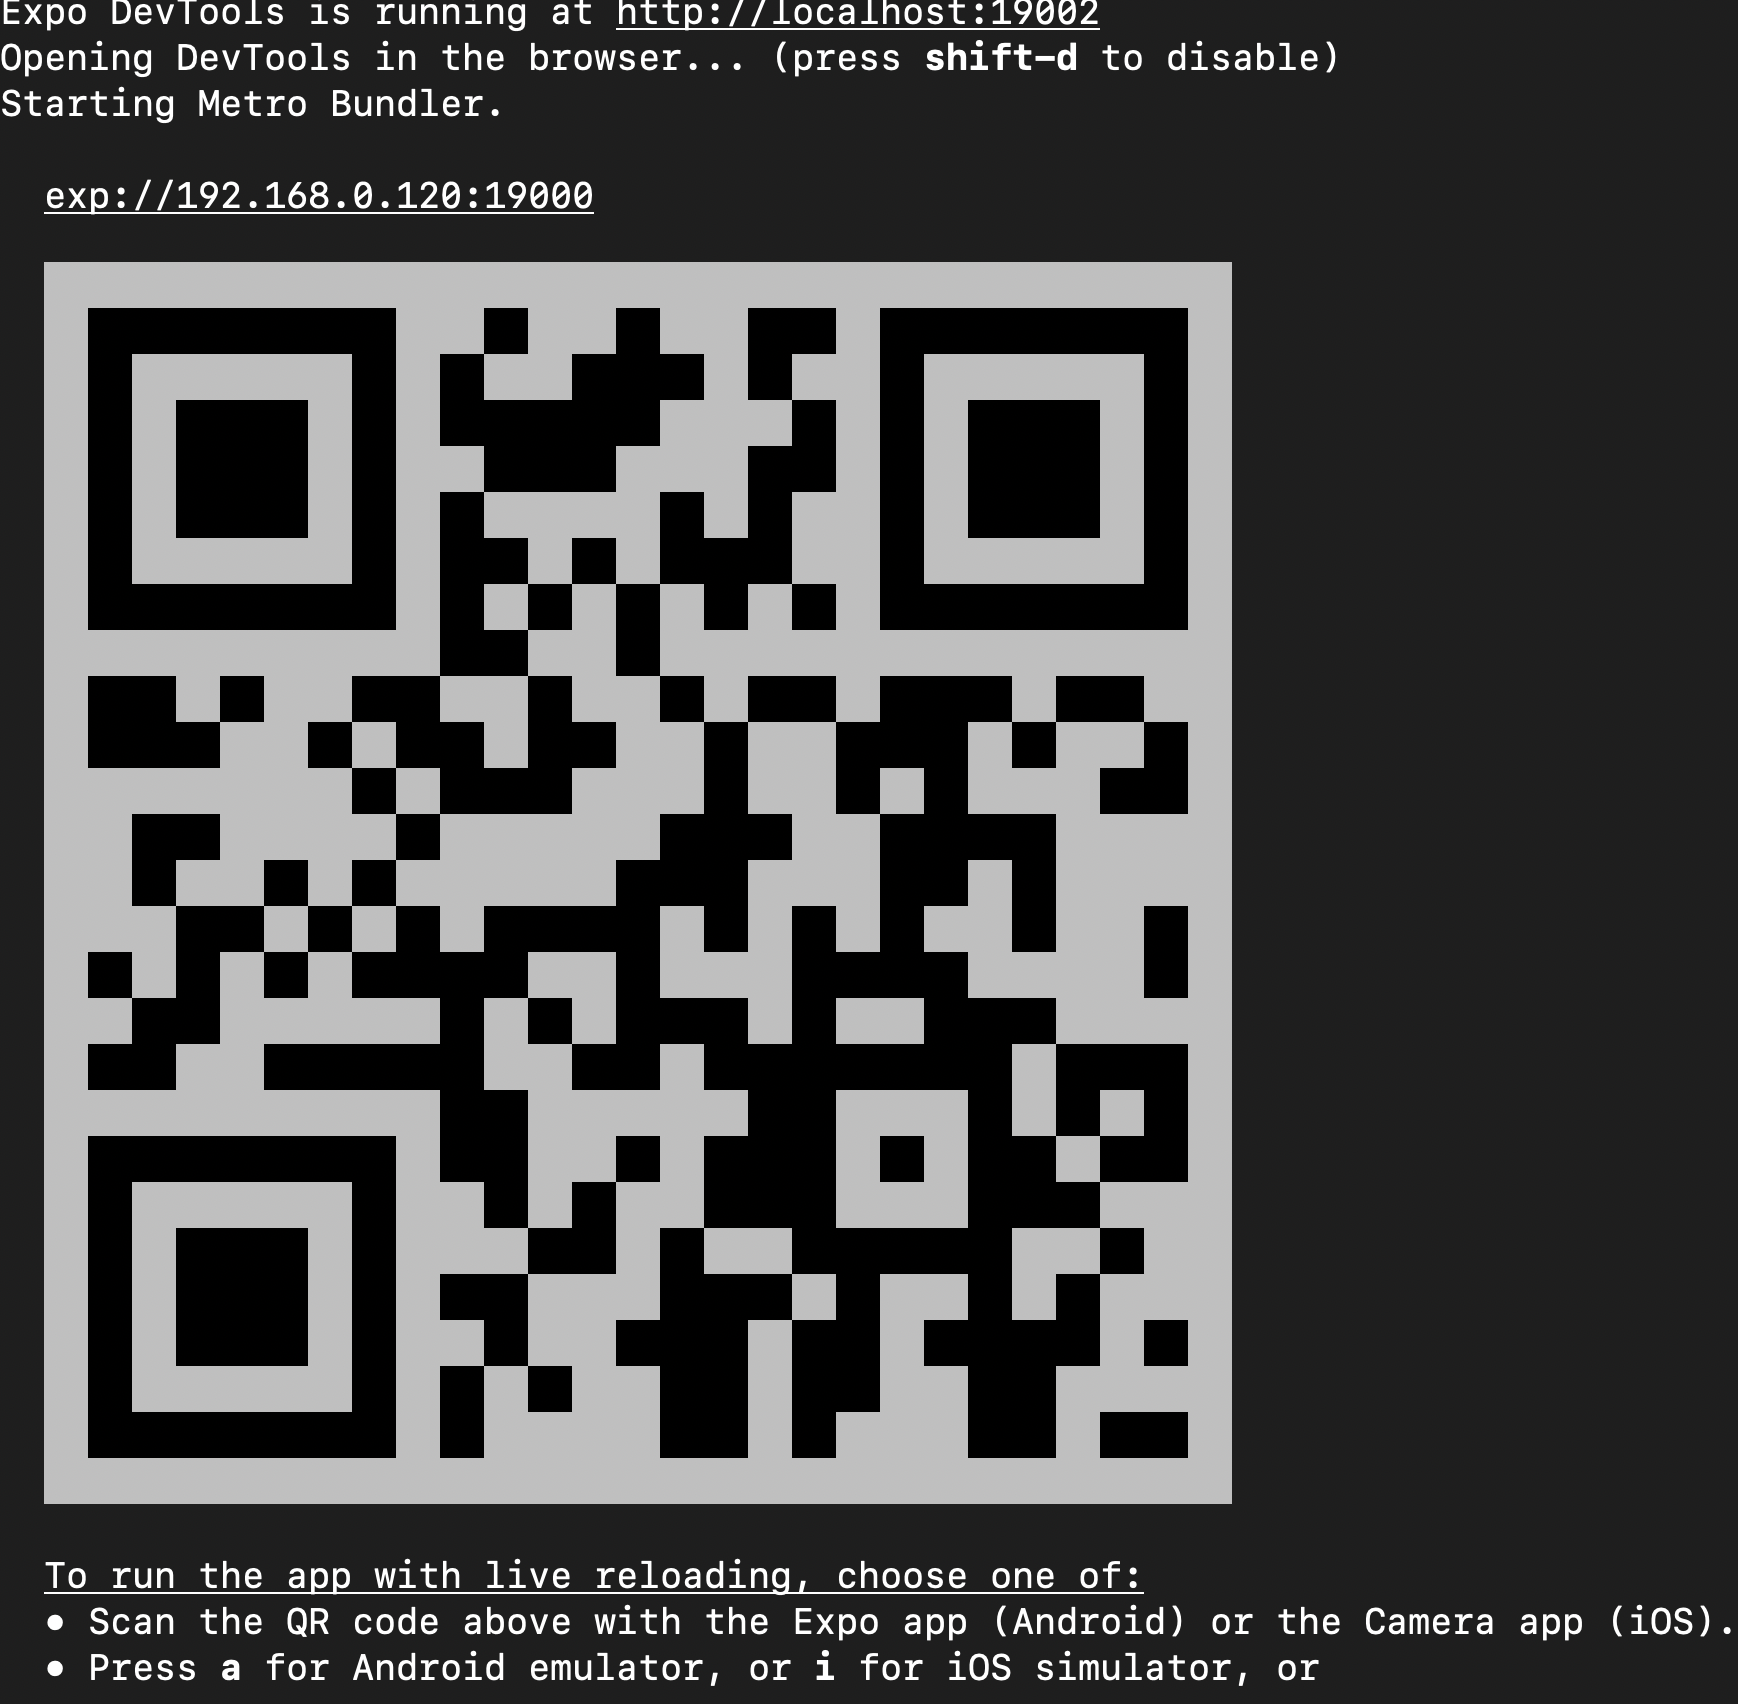
This will open a window in your browser where you can see the logs. It will also generate a QR code that you can scan to run the app on your device.
The good thing about expo is that you don't need to install and configure the simulators to run the app. It still gives you the option to run expo on the simulator, but you have to install and configure the simulator by yourself.
Back to our app. Assuming you've successfully run the app on the device, this will be the default screen:

Open the app directory in your favorite code editor. I'm using VS Code.
The App.tsx will look like this:
import {StatusBar} from 'expo-status-bar' import React from 'react' import {StyleSheet, Text, View} from 'react-native' export default function App() { return ( <View style={styles.container}> <Text>Open up App.tsx to start working on your app!</Text> <StatusBar style="auto" /> </View> ) } const styles = StyleSheet.create({ container: { flex: 1, backgroundColor: '#fff', alignItems: 'center', justifyContent: 'center' } }) How to create the UI
After having the project running, now it's time to start creating some UI.
Install expo-camera
The next step is to install expo-camera, like this:
expo install expo-camera We will create a simple UI that will allow the user to start the process of using the camera.

import {StatusBar} from 'expo-status-bar' import React from 'react' import {StyleSheet, Text, View, TouchableOpacity} from 'react-native' export default function App() { return ( <View style={styles.container}> <View style={{ flex: 1, backgroundColor: '#fff', justifyContent: 'center', alignItems: 'center' }} > <TouchableOpacity style={{ width: 130, borderRadius: 4, backgroundColor: '#14274e', flexDirection: 'row', justifyContent: 'center', alignItems: 'center', height: 40 }} > <Text style={{ color: '#fff', fontWeight: 'bold', textAlign: 'center' }} > Take picture </Text> </TouchableOpacity> </View> <StatusBar style="auto" /> </View> ) } const styles = StyleSheet.create({ container: { flex: 1, backgroundColor: '#fff', alignItems: 'center', justifyContent: 'center' } }) It's a simple UI: we import TouchableOpacity for the button and do some simple styling. If you are wondering how styling works in React Native, you can check out my two articles here:
- Styling in React Native
- Demystifying Flexbox in React Native
Now we have to use a useState hook to manage the state and display the camera view when the user press the take picture button.
<TouchableOpacity onPress={__startCamera} style={{ width: 130, borderRadius: 4, backgroundColor: '#14274e', flexDirection: 'row', justifyContent: 'center', alignItems: 'center', height: 40 }} > <Text style={{ color: '#fff', fontWeight: 'bold', textAlign: 'center' }} > Take picture </Text> </TouchableOpacity> const [startCamera,setStartCamera] = React.useState(false) const __startCamera = ()=>{ } There are two important things we have to do when the user presses the button:
- Ask permission to access the camera. In mobile development, accessing many native APIs and mobile features is often restricted by the user's permissions and the privacy. It's just something that you have to get used to when developing mobile apps.
- Change the state and present the camera.
Let's import the camera module from expo-camera with this command:
import {Camera} from 'expo-camera' And add the camera view, like this:
<Camera style={{flex: 1,width:"100%"}} ref={(r) => { camera = r }} ></Camera> We can use ref to access the camera's methods:
let camera: Camera When the take picture button is pressed the __startCamera function will be called:
const __startCamera = async () => { const {status} = await Camera.requestPermissionsAsync() if(status === 'granted'){ // do something }else{ Alert.alert("Access denied") } The function will ask for permission first. If the user grant access to the camera, we can proceed and open the camera. If not, we show a simple alert.
Add the camera component
Let's display the camera when the user grants access to the device's camera.
const __startCamera = async () => { const {status} = await Camera.requestPermissionsAsync() if (status === 'granted') { // start the camera setStartCamera(true) } else { Alert.alert('Access denied') } } We have to make some changes to the UI and add a conditional rendering. We display the camera only when the user requests it, otherwise we display the default screen.
{startCamera ? ( <Camera style={{flex: 1,width:"100%"}} ref={(r) => { camera = r }} ></Camera> ) : ( <View style={{ flex: 1, backgroundColor: '#fff', justifyContent: 'center', alignItems: 'center' }} > <TouchableOpacity onPress={__startCamera} style={{ width: 130, borderRadius: 4, backgroundColor: '#14274e', flexDirection: 'row', justifyContent: 'center', alignItems: 'center', height: 40 }} > <Text style={{ color: '#fff', fontWeight: 'bold', textAlign: 'center' }} > Take picture </Text> </TouchableOpacity> </View> )} 
Cool, now we need to add a button so we can take the actual picture.
Add the capture button
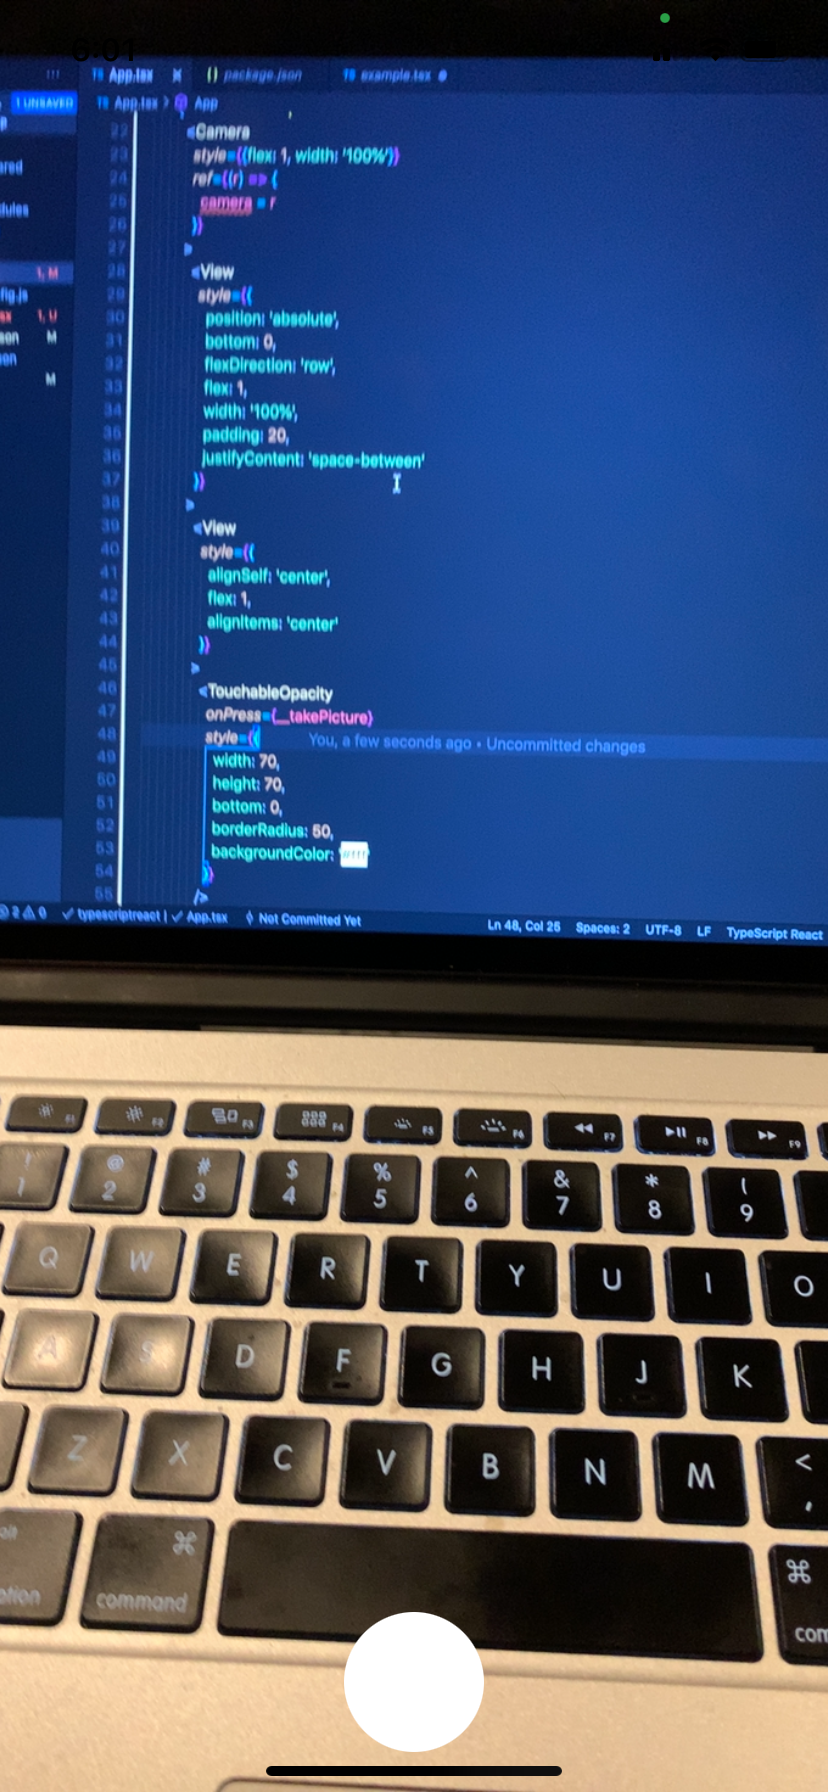
This is a simple View inside the camera view that has an absolute position. So we make sure that it is always on the top of the camera.
<View style={{ position: 'absolute', bottom: 0, flexDirection: 'row', flex: 1, width: '100%', padding: 20, justifyContent: 'space-between' }} > <View style={{ alignSelf: 'center', flex: 1, alignItems: 'center' }} > <TouchableOpacity onPress={__takePicture} style={{ width: 70, height: 70, bottom: 0, borderRadius: 50, backgroundColor: '#fff' }} /> </View> </View> How to take a picture
The app should take a picture when capture button is pressed. That function will look like the below:
const __takePicture = async () => { if (!camera) return const photo = await camera.takePictureAsync() } First, we check that we have access to the Camera component using ref:
if (!camera) return // if the camera is undefined or null, we stop the function execution Then we take the picture by calling the takePictureAsync method. It returns a promise and an object that contains the picture's details. The result will look like this:
Object { "height": 4224, "uri": "file:///var/mobile/Containers/Data/Application/E6740A15-93AF-4120-BF11-6E8B74AFBF93/Library/Caches/ExponentExperienceData/%2540anonymous%252Fcamera-app-ee0fa3c8-1bb1-4d62-9863-33bf26341c55/Camera/19F0C5DD-7CA6-4043-8D89-AF65A1055C7E.jpg", "width": 1952, } We are only interested in the Picture URL uri. After we take a picture, we have to show the photo preview and hide the camera view. To do that we will use two hooks to change the state:
const [previewVisible, setPreviewVisible] = useState(false) const [capturedImage, setCapturedImage] = useState<any>(null) const __takePicture = async () => { if (!camera) return const photo = await camera.takePictureAsync() console.log(photo) setPreviewVisible(true) setCapturedImage(photo) } -
setPreviewVisibleto show the preview -
setCapturedImage(photo)to store the object result
Then we display the preview like this:
{previewVisible && capturedImage ? ( <CameraPreview photo={capturedImage} /> ) : ( <Camera style={{flex: 1}} ref={(r) => { camera = r }} > <View style={{ flex: 1, width: '100%', backgroundColor: 'transparent', flexDirection: 'row' }} > <View style={{ position: 'absolute', bottom: 0, flexDirection: 'row', flex: 1, width: '100%', padding: 20, justifyContent: 'space-between' }} > <View style={{ alignSelf: 'center', flex: 1, alignItems: 'center' }} > <TouchableOpacity onPress={__takePicture} style={{ width: 70, height: 70, bottom: 0, borderRadius: 50, backgroundColor: '#fff' }} /> </View> </View> </View> </Camera> )} The CameraPreview component looks like this:
const CameraPreview = ({photo}: any) => { console.log('sdsfds', photo) return ( <View style={{ backgroundColor: 'transparent', flex: 1, width: '100%', height: '100%' }} > <ImageBackground source={{uri: photo && photo.uri}} style={{ flex: 1 }} /> </View> ) } And the result looks like this:

How to re-take a picture
We can add some buttons to the preview that will allow the user to perform more actions. For example, they could re-take the photo or save it.
Add the savePhoto and retakePicture props to the CameraPreview component like this:
<CameraPreview photo={capturedImage} savePhoto={__savePhoto} retakePicture={__retakePicture} /> When the Re-take button is pressed, we will have to hide the preview, remove the current picture, and show the camera again. Do that with the following code:
const __retakePicture = () => { setCapturedImage(null) setPreviewVisible(false) __startCamera() } 
How to add other options – back camera, flash, and more
expo-camra offers many options for customizing the camera, like FlashMode, setting the Camera type (front/back), zooming, and so on.
How to add FlashMode
Let's add an option so the user can turn FlashMode on and off:
We simply create a small button to switch off/on the flash, like this:
<TouchableOpacity onPress={__handleFlashMode} style={{ position: 'absolute', left: '5%', top: '10%', backgroundColor: flashMode === 'off' ? '#000' : '#fff', borderRadius: '50%', height: 25, width: 25 }} > <Text style={{ fontSize: 20 }} > ⚡️ </Text> </TouchableOpacity> And we just change the state when the button is pressed:
const [flashMode, setFlashMode] = React.useState('off') const __handleFlashMode = () => { if (flashMode === 'on') { setFlashMode('off') } else if (flashMode === 'off') { setFlashMode('on') } else { setFlashMode('auto') } } And then we add FlashMode props:
<Camera flashMode={flashMode} style={{flex: 1}} ref={(r) => { camera = r }} ></Camera> How to access the front and the back camera
We will add a button that switches between the back and front camera.
We can get the default camera type directly from the camera module like below:
const [cameraType, setCameraType] = React.useState(Camera.Constants.Type.back) Add type props like this:
<Camera type={cameraType} flashMode={flashMode} style={{flex: 1}} ref={(r) => { camera = r }} ></Camera> And add the switch button:
<TouchableOpacity onPress={__switchCamera} style={{ marginTop: 20, borderRadius: '50%', height: 25, width: 25 }} > <Text style={{ fontSize: 20 }} > {cameraType === 'front' ? '?' : '?'} </Text> </TouchableOpacity> And switch function:
const __switchCamera = () => { if (cameraType === 'back') { setCameraType('front') } else { setCameraType('back') } } Here is the result:
You can find the full source code on GitHub.
Wrapping up
In general, Expo is an amazing tool that can save you a lot of time. It helps you start building directly and saves you the pain of environment setup.
Sometimes you may want to build a native extension and handle using native features in your own way. In this case I'd recommend using the react-native CLI so you can modify and play with native code easily.
Hi, my name is Said Hayani. I created subscribi.io to help creators, bloggers and influencers grow their audience through the newsletter.
Join my Mailing list if you are interested in reading more about React Native.
Learn to code for free. freeCodeCamp's open source curriculum has helped more than 40,000 people get jobs as developers. Get started
How To Create - A Native App
Source: https://www.freecodecamp.org/news/how-to-create-a-camera-app-with-expo-and-react-native/
Posted by: johnsonexacce.blogspot.com
0 Response to "How To Create - A Native App"
Post a Comment